Well, it took a while, but I’ve extracted my digit and got on with our Triton build. Building a magazine with a small team distorts time beyond comprehension and those weeks, days and hours you thought you had, vanish. But here we are, issue 004 is done and dusted, and stage one of Project Triton is finished. What a boring bloody name, we’ll have to fix that.
The hardest part of any build is working out what you’re going to, you know, build. The expectation out there beyond the phone screens is that we’d go a bit mental and put together a Triton monster truck. One of those mega-dollar, completely unrealistic click-bait, attract the punters, kind of things. TopGear did just that with an MQ Triton (L200) last year. They called it Swarm and used Baja pre-runners as their inspiration. What they ended up with was an overweight, unbalanced, funky-to-drive blue Triton with a heck of a lot of stupid shit going on. Cool but unrealistic and how many megadollar builds have you seen lately that those two words describe perfectly?
It happened again over in New Zealand, where the Triton Huntaway was cobbled together. It featured all the good gear (ride the sarcasm wave with me here), like rear suspension lift blocks, strut-tower spacers, 27mm wheel spacers, over 100mm of suspension and body lift and 35-inch tyres. Yep, it’d drive like a bag of shit and eventually kill you, but click, click, click, it looked mad brother.
Nope, that’s not our style, we’re all grown-up at Loaded 4X4, and we enjoy driving on and off-road far too much to build an illegal, ill-conceived show pony.
I thought about building a tourer, but our MQ Triton tourer would have simply joined the 1000s of other nicely modded touring Tritons out there, and that would have been that. Besides, the MQ has a nice balance about it on-road, with its all-alloy turbo-diesel endowing it with a light and responsive front-end. Bolting on the full complement of bar work and accessories would have turned it into a lumbering truck, and while I don’t mind a 4X4 with a bit of truck about it, I have eventually grown weary of it with previous 4X4s that I’ve owned and added a bucket load of weight too. It’s very easy to fall into the habit of bolting on as much swag as the credit card can deal with, and that’s the new 4X4 driven custom car scene in a nutshell, but less is more in my opinion.
The other major consideration for me was how I use the Triton. Like the majority of 4X4 ute owners, the Triton, unfortunately, spends more than 90 percent of its time on-road. And that right there is the clincher. So, over-the-top and ill-conceived ‘look at me’ mods were out, as was adding unnecessary weight or buggering up the way it drove. I wanted a Triton that steered, handled and braked considerably better than the stock car on-road, performed considerably better off-road and was legal or easily made legal. I’ve taken more than a small amount of inspiration from Mitsubishi’s, sadly, mostly lost rally heritage (the Triton is all-wheel-drive remember), and I’m bringing it back for the buggers. The Triton should sit loud and proud on dealer forecourts, oozing rally attitude, but it doesn’t.
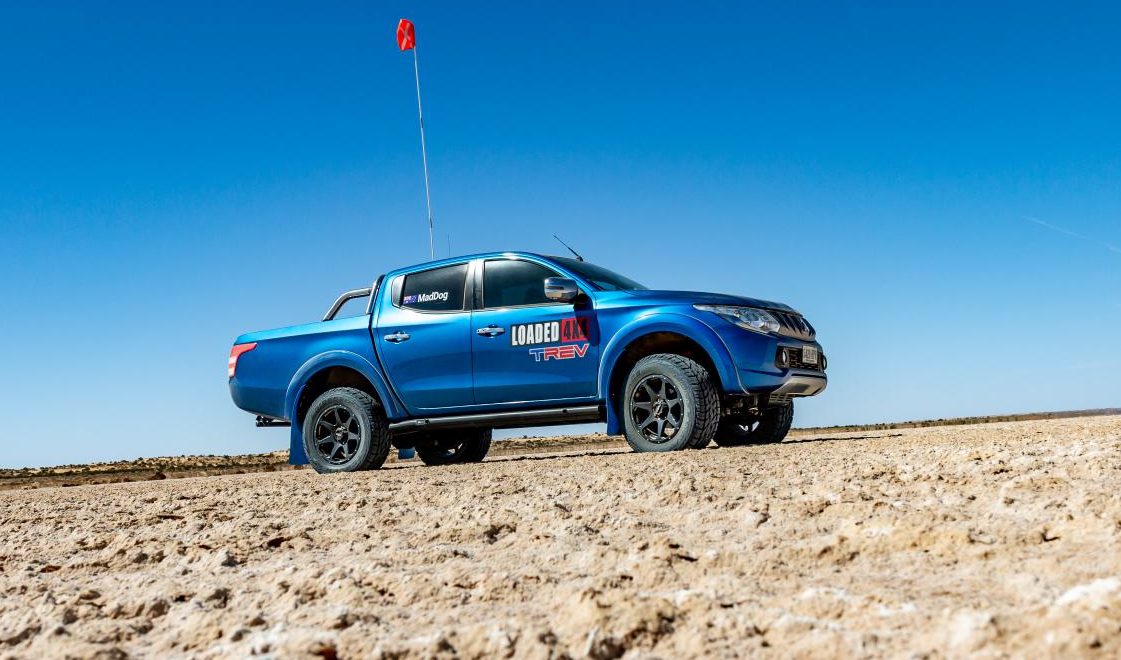
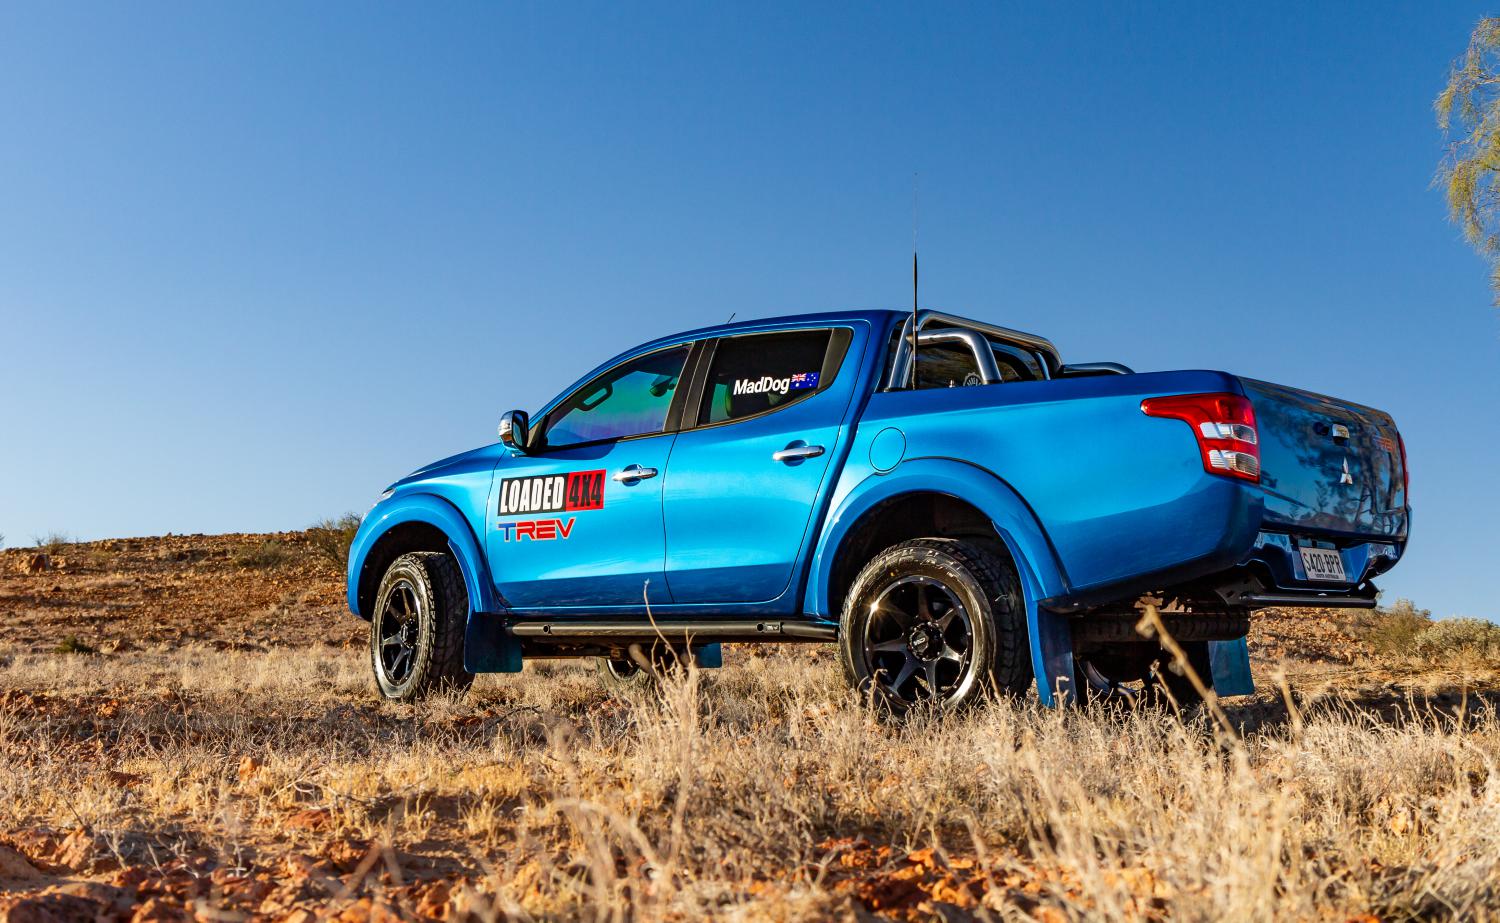
Thanks to Mitsubishi’s penny-pinching ways with tyres, bumpers, sidesteps and that short wheelbase, Triton is a knock-kneed, unbalanced looking nerd, but there are some nice lines hidden behind the ‘straight from the showroom’ crap. You could say it’s a bit of a ‘Trevor’ that we needed to toughen up and turn into a Trev. Trev, as it turns out, just happens to stand for Triton Really Excellent Version and while that’s us taking the piss out of us…it is what we’ve ended up with, so that’s what we’re calling him.
TREV – Stage One
Stance is everything if you want your 4X4 to look right. Triton’s are delivered with their arses perched high in the air and correcting that involved raising TREV’s front around 25mm. Brendan (our suspension guru) project managed this part of the build. He chose to keep the rear leaf packs as they are softer than aftermarket options and I wasn’t planning on carrying big loads. The new front struts are fitted with King variable rate coils, and because we aren’t weighing the front down with a bar, we didn’t need a heavy spring. The spring rate is just right for a firm but compliant ride. Brendan talked Dobinsons into handing over a set of their speccy monotube shock bodies and added his own custom internals, and I reckon he’s got it bang on. Trev rides and handles considerably better than a stock Triton and to be completely honest, better than any 4X4 ute that I’ve ever driven, and I’ve driven them all.
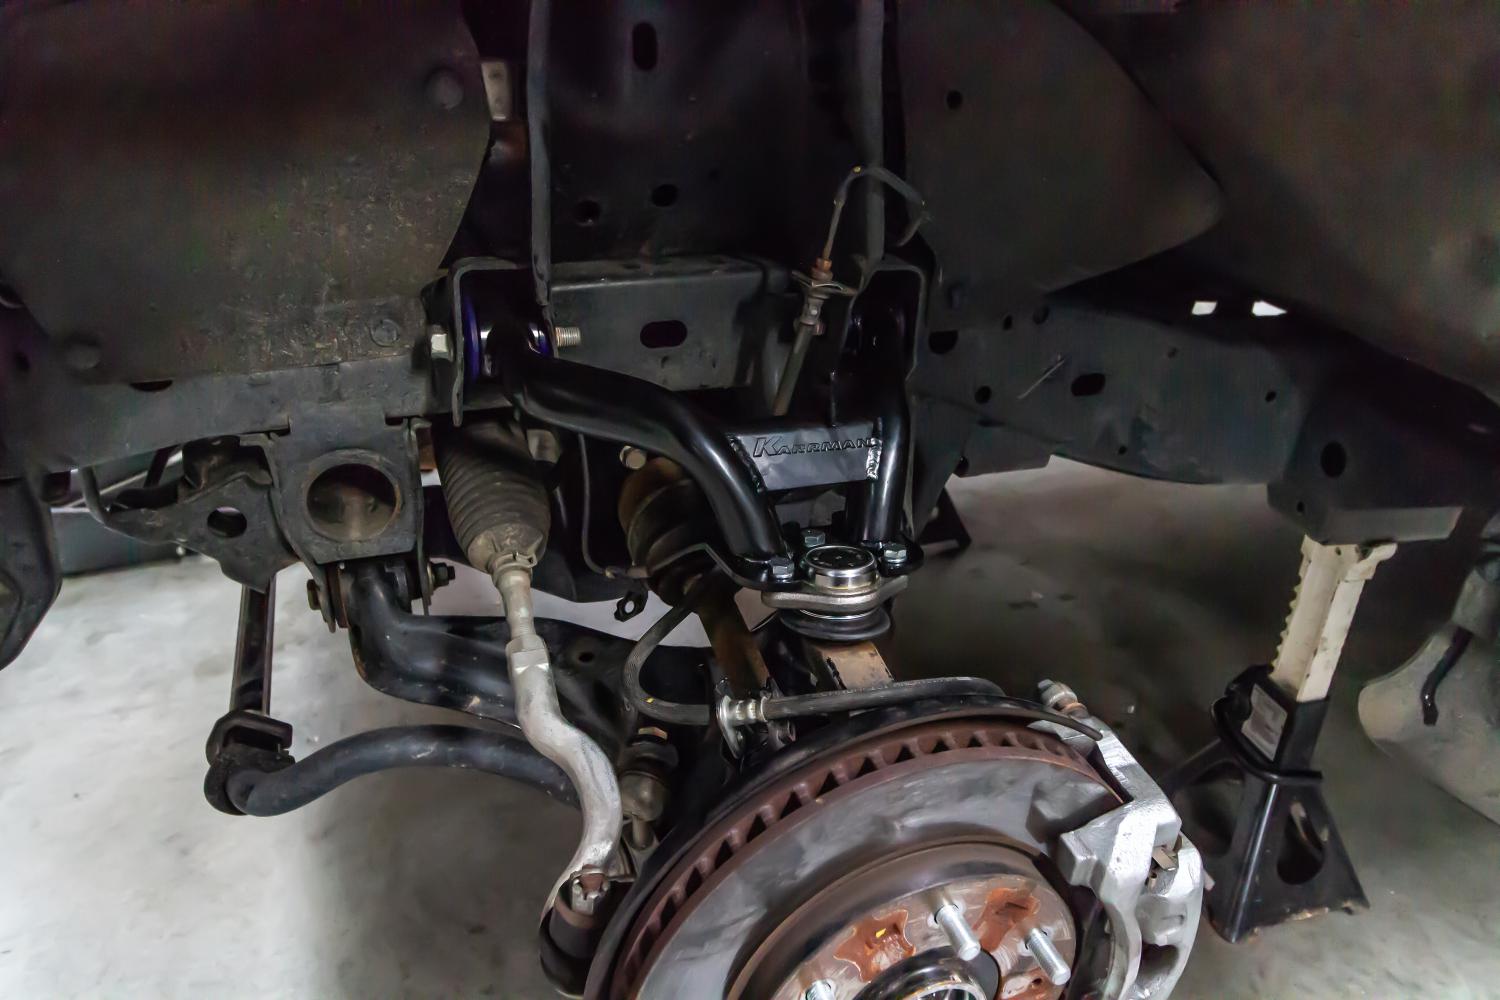
That mild 25mm front suspension lift left the Triton with little in the way of down travel, and if you’ve ever driven an MQ with a 30mm or higher lift, as I have, you’ll know they can be bump-steering steering-rack-rattling pigs. I wasn’t having any of that, and I wanted more down-travel than stock. The solution was one of Nick Kotter’s Karrman diff-drop and upper-control-arm kits. They’re a work of art, and Nick had the entire kit fitted in around six hours. It wasn’t a Sunday he’ll remember fondly (he missed a day trip with mates) to lie on his back on a cold cement floor, but he knows his shizzle. We ended up with 70mm more down-travel than stock, perfectly flat CVs and a nicely aligned front prop-shaft. You could say that this was a little bit of overkill for a 25mm lift, but I think it was doing the job right, and sticking to our plan to improve the Triton’s on-road and off-road performance. Big lifts don’t interest me, but more wheel travel in an IFS 4X4 does. There are cheaper solutions, but none of them offer all the benefits of the Karrman kit.
Having had the suspension out and with a trip from Nick’s factory in Melbourne back to home base in Adelaide pending, a wheel alignment was in order. Nick booked me into Hakon in Somerton. Owner Reade Coulston reckons he hasn’t looked at the ‘official alignment spec listings’ for any car for pretty much forever. His theory is, that if you need the book or the computer, you don’t know what you’re doing. Reade set the Triton up with around 2 degrees of positive caster (moved the wheels towards the front), a smidge of toe-in to help it track straight and wear tyres evenly and zero camber. The result was a Triton with slightly heavier steering, which I like, but also one that is happier to turn in to a corner and has noticeably more feel through the wheel; better on the highway and the twisty bits. Who’d have thought a simple wheel-alignment could add so much to the drive?
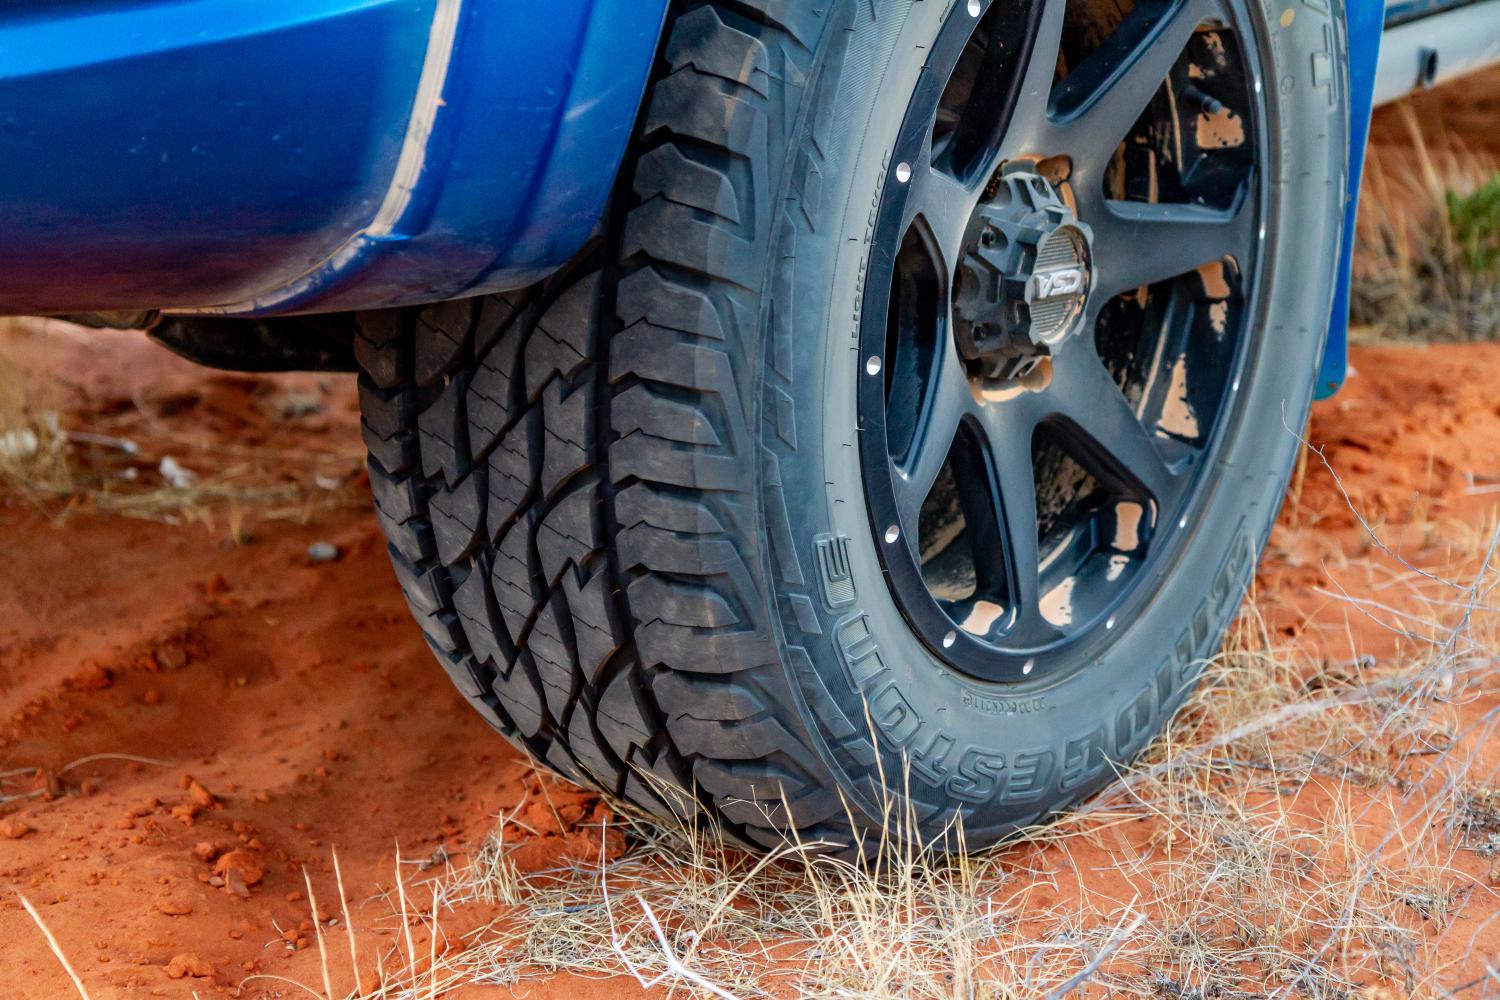
Next up was wheels and tyres. If there are two more crucial aesthetic aspects of a build, I don’t know what they are. I subsequently lost a tonne of sleep worrying about my choices here. We know the folk out at CSA Alloy Wheels quite well, and I’d had my eye on their relatively new HAWK for a while. It’s clean, unfussy design appealed to my inner old-school, but I wanted to upsize from the stock 17×7.5 positive 38 rims. The HAWKS come in an 18×9 positive 20 (and many other sizes) that my calculations suggested would just fit. They’d sit 1mm further in and 37.1mm further out than the stock rims. Legal from a track perspective, but they were going to be close to poking out past the stock wheel arch flares and clearance when turning was another potential issue when tyres were fitted.
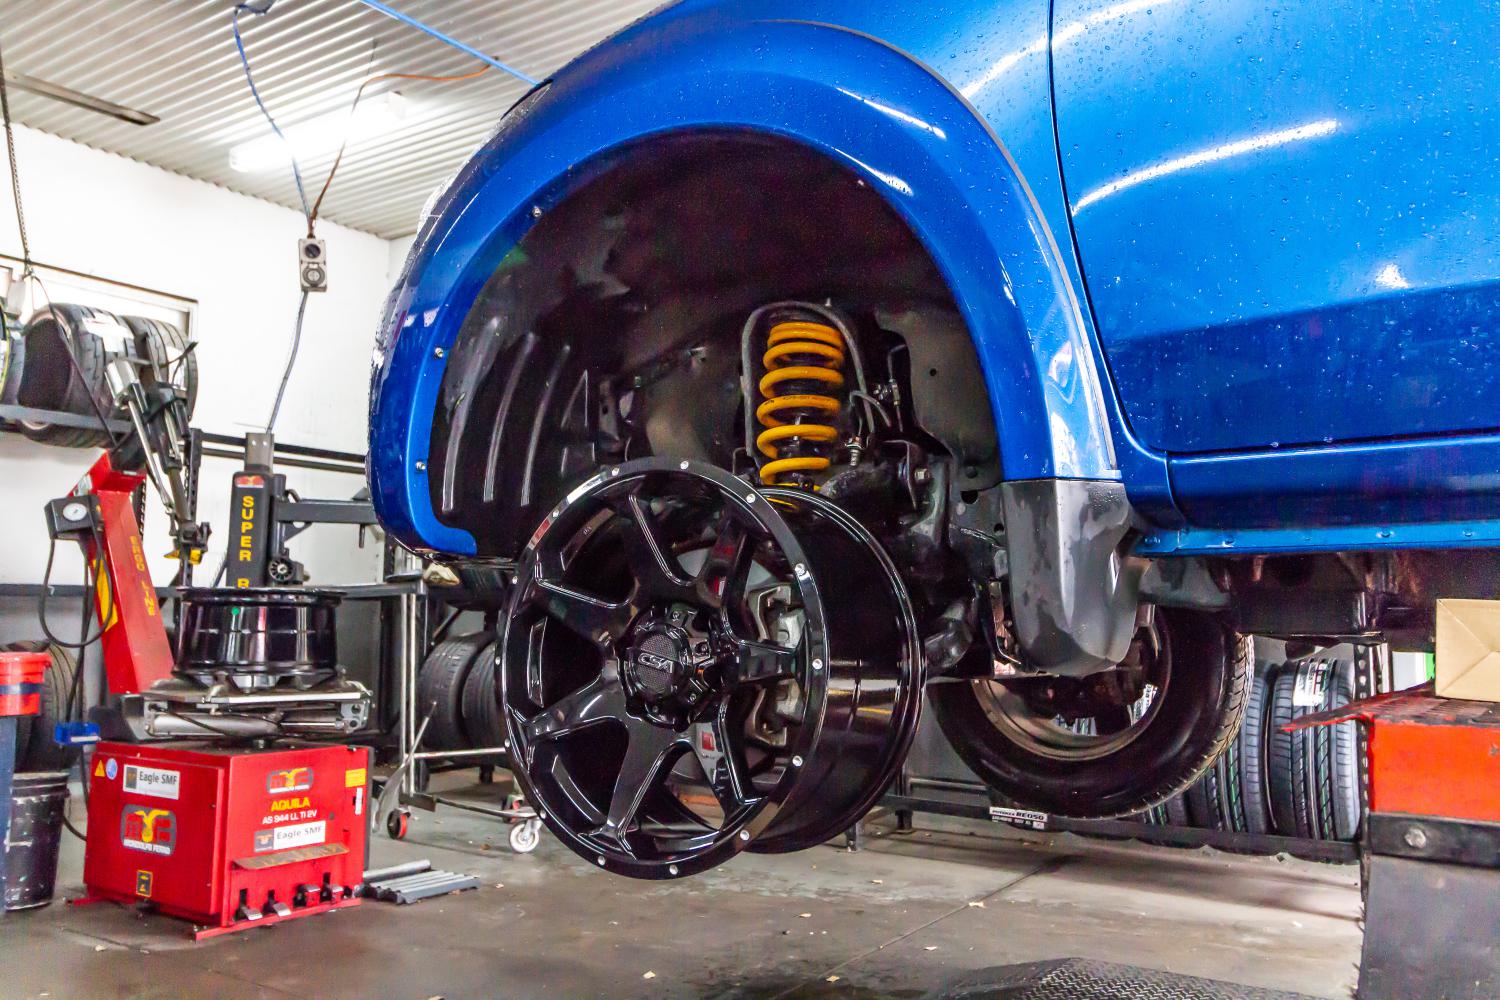
On the subject of tyres, Bridgestone happened to have THE perfect sized Light Truck All-Terrain tyre for the HAWK rim on a Triton. Their 285/60 R18 D697 Dueler has a rolling diameter of 799mm, and that makes it a legal-size increase over the 750mm (pathetic…) diameter stock rubber. It also fits under the tray where the OEM spare is stored, just.
It all came together at the Gouger Street Adelaide Bridgestone Tyre Centre, where I quietly crapped myself while rims and tyres were mated, balanced and bolted up. All of the worry was for nought as they fitted perfectly, cleared the inner guards and stock mudflaps on full-lock and looked sensational. Phew! Okay, depending on where you stand, there may or may not be a smidge of ‘poke’ past the top of the rear flares, and I honestly can’t decide if there is or isn’t, so I’m rolling with isn’t.
The increase in wheel size has forced TREV into a couple of changes that are outside his control. The good one is that his speedo is now bang-on accurate, as the bloody things should be. The not so good is a slight increase in fuel use. TREV uses around half-a-litre per 100km more at highway speeds or around 9.5 L/100km on average. I can live with that, and it would be worse again with a front bar, a higher lift, a roof rack or one of those ‘block of flats’ rooftop tents. In the scheme of things, TREV is doing A-OK.
Mudflaps were next, as the wider tyres were going to sling all sorts of crap at the lower section of the side bodywork. The hard-plastic factory mudflaps were removed, and some polyurethane sheet procured and cut into rally-style flaps, designed to sit wide of the wheel arch flare to give the bodywork more protection. There was a day’s work involved in working out the shape, mounting points, fixings and brackets. I’ll confess now, that I’ve wanted to fit rally-style mudflaps to a Triton since I had the old ML back in 2007. Dunno what that’s all about but there you go.
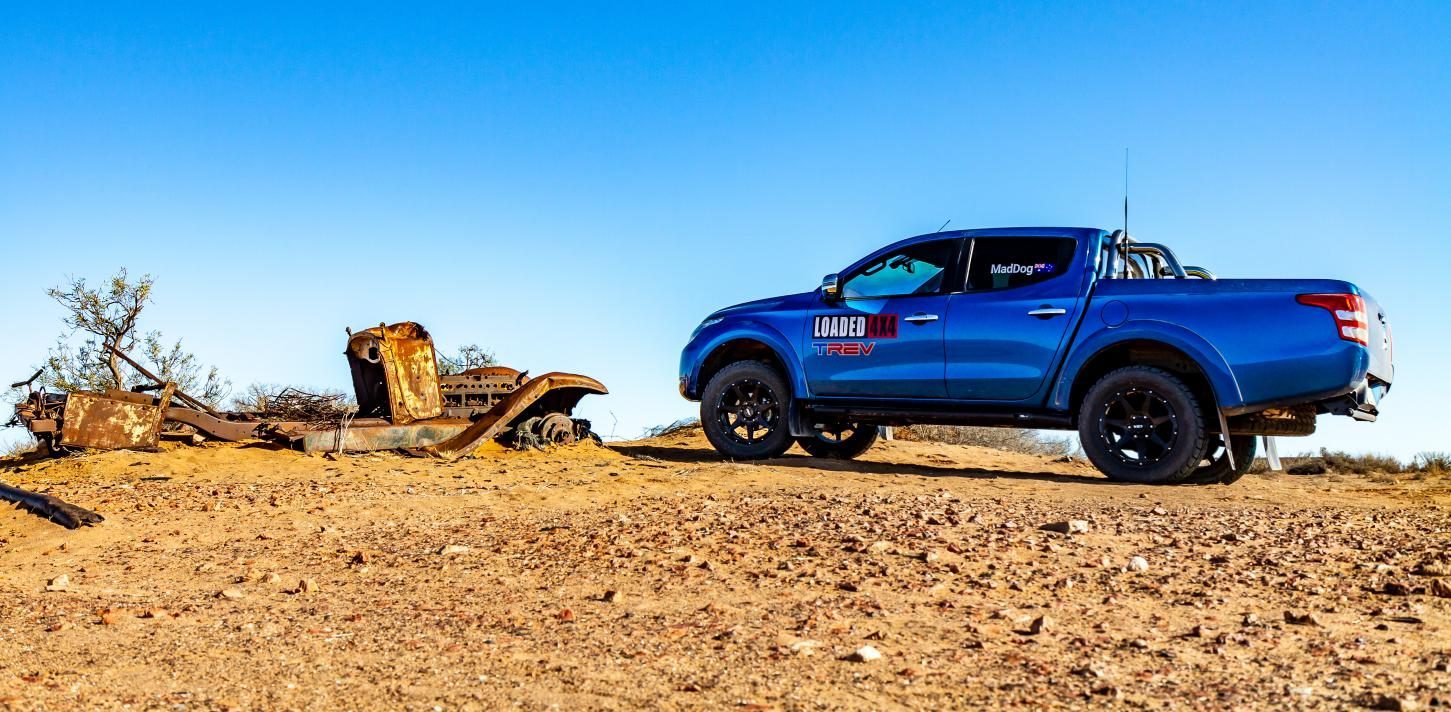
The rear bumper was turfed, and we welded some 40mm nominal bore water pipe onto the bumper brackets. These two brackets, located on either side of the chassis, have a cut-out perfectly sized to accept this size pipe. L200s sold in the UK, and even TopGear’s Swarm, have pipe welded to these brackets running from one side of the tub to the other straight off the showroom floor. We didn’t like that arrangement much, so we used a shorter section of pipe and drilled the brackets so that we could tilt them up until the bar sat just under the rear edge of the tub that we wanted to protect. It won’t offer the same side protection as one of the full aftermarket bars, but it weighs nothing in comparison, cost $38 and used tubs are cheap.
The factory sidesteps were replaced with a set of Frontrunner rock sliders. I looked everywhere, and these were the only slider I liked the look of, purely from an aesthetic point of view. Sill protection is what it is all about, but I also wanted them tucked up out of the way, rather than all sticky-outy. The absence of front and rear bar work meant that step sliders would have looked all wrong and the Frontrunner product fitted the bill perfectly, achieved the look I wanted, and they were the least expensive of all the slider options for the MQ at the time. Unfortunately fitting them was a complete bitch. The fitting instructions suggested it was a 40-minute job, but that didn’t allow for the hi-lift jack tubes that fouled the sills and had to be cut and painted, the plethora of spacers that needed to be made to allow for the way out of whack front mounts, or the chassis plates that were too thick to bend just a little around the chassis and lock the sliders in place, which required more spacers to be made to set the height of the sliders. Then there were the bolts that were too long for the narrow section of chassis on the passenger side near the fuel tank. All up, fitting the Frontrunner sliders was the best part of a day’s work and an exercise in frustration. Only sign up for these sliders if you have patience and the ability to fabricate the extra parts you’ll need. A great looking and properly robust product that unfortunately just doesn’t fit out of the box.
Where’s the canopy you fool? Sorry folks, I’ve done the canopy thing before, and while they serve a genuine purpose for many ute owners, I wasn’t interested in the extra weight and cost. TREV, as you know, is an exercise in less is more, and I’ll carry that through to how he’s used. What doesn’t fit in the tub and can’t deal with a bit of rain or dust, doesn’t go. To make life a little easier and get TREV across the Simpson last month, I’ve added a custom jerry can holder behind the fridge, that’ll take 3 x 20-litre plastic Jerrys and bolted a decent-sized space-case-style sealed box up the front of the tub. It can carry tools, or any camping gear or food that needs to be kept dry and dust-free.
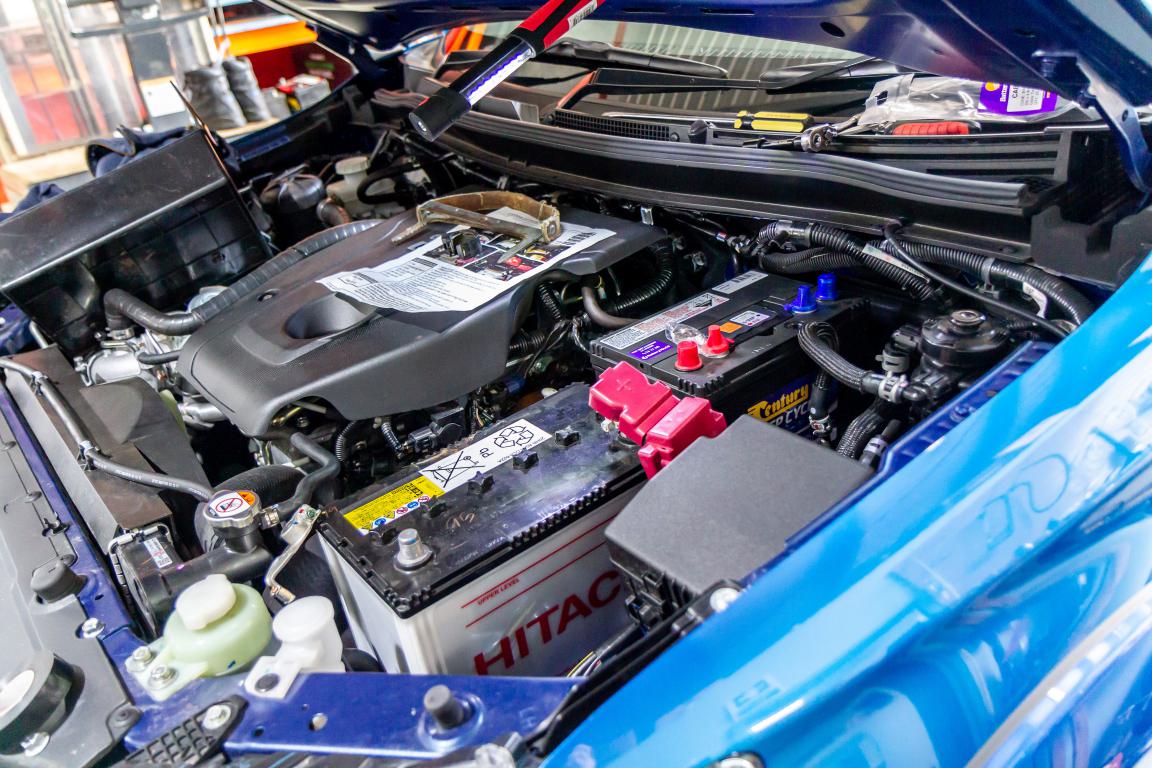
Finishing off the first stage of the TREV build is the requisite dual battery system and fridge, cos you gotta have a fridge. From the moment I first saw the ARB Elements fridge, I was smitten. Designed to sit out in the elements, hence the title, this is a serious fridge build to do time in the open tub of a ute. It’s weather and dustproof and comes with the most sensible addition to any fridge, a gas strut on the door!
I thought powering the fridge was going to be easy. Hook it up to the main battery and Bob’s your uncle and Fanny’s your granny, but our voltmeister Vince wasn’t having a bar of that nonsense. Vince arranged for a Battery World deep cycle secondary battery to be installed under the Triton’s bonnet with a Redarc DC-DC charger to keep it happy. Power was run through to the tub, and the Elements fridge is, well, in its element. You can check out the second battery install and what products were used in this issue by clicking here.
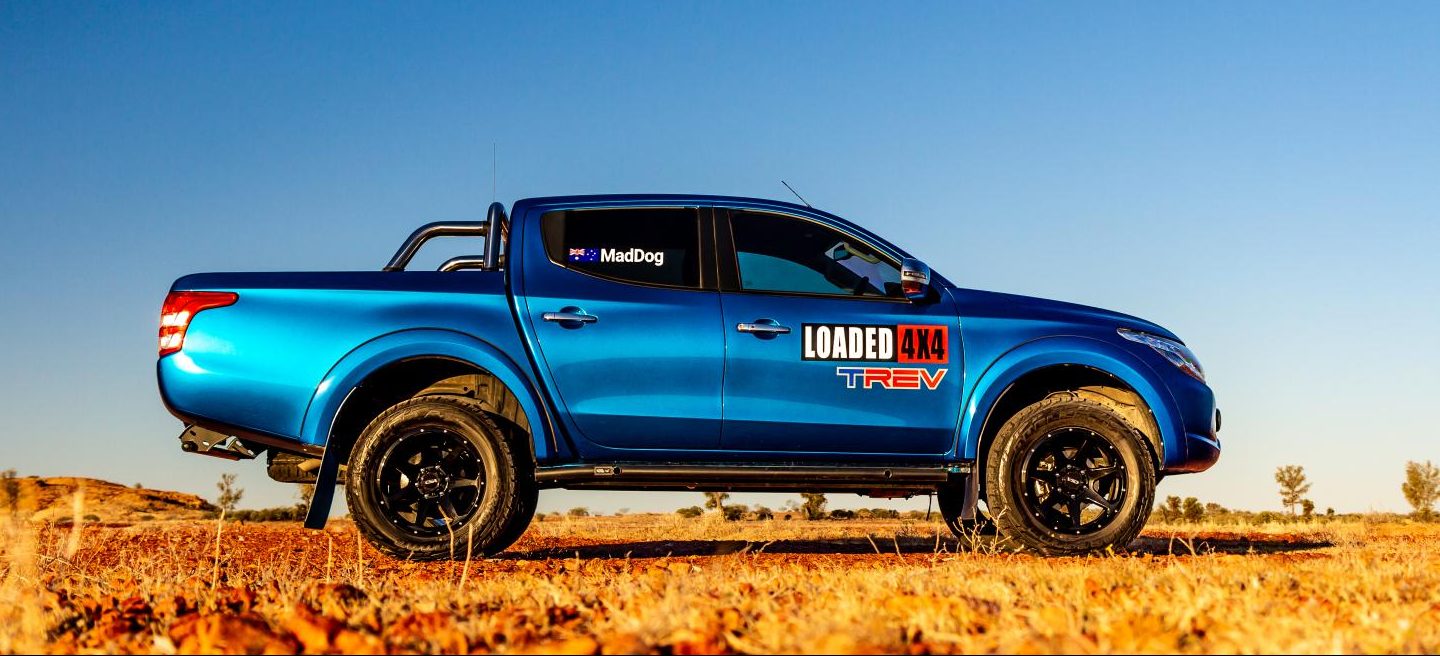
And that’s it for stage one of this build. We’ve turned an ugly duckling into a decent looking rig, one that isn’t embarrassing to drive in a ‘look at me’ kind of way. We’ve made a bunch of well-considered changes that improve the Triton considerably in almost every way, both on and off-road and make every minute behind the wheel enjoyable, rather than a compromise. But we can still do better!
Stage two will see a front brake upgrade, a rear disc conversion and the addition of a rear anti-roll bar. That’ll have TREV handling and braking as these utes should straight off the showroom floor; an axe we’ll keep grinding until things change.
Engine tuning? Honestly, the Triton doesn’t need it (we’ve added bugger-all weight remember) and our ‘tune whisperer’ tells us that no-one has a properly decent tune for the Triton’s 2.4-litre MIVEC engine yet; the MIVEC valve-timing side of things has the tuning fraternity a bit flummoxed. There is one crew that I expect will have a tune available shortly, as they’re just working their way through the emissions side of things. Yep, they do it right, and their tune will be completely legal. When that happens, a tune might join the stage two part of TREV’s development. Maybe.
Stay tuned.


GIPHY App Key not set. Please check settings